Intel 社製 SSD へ容易に既存環境を移行できるソフトウェア「Intel Data Migration Software」のブータブル メディアを作成する方法を記載します。なお、ブータブル メディアを利用しない通常の利用方法については、次のサポート記事をご参照ください:
→ Intel Data Migration Software の使い方
Intel Data Migration Software のダウンロードとインストールについては、次のサポート記事をご注意ください:
→ Intel Data Migration Software をインストールする方法
ブータブル メディアを作成する方法
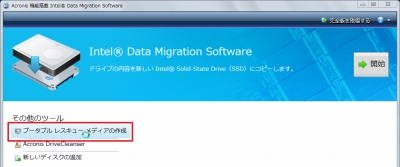
「Intel Data Migration Software」を起動し、[ブータブル レスキュー メディアの作成]をクリックします。
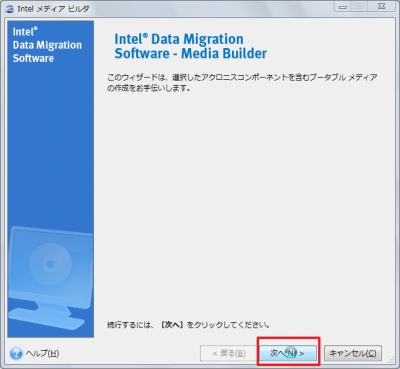
「Intel Data Migration Software – Media Builder」が起動しますので、[次へ]をクリックします。
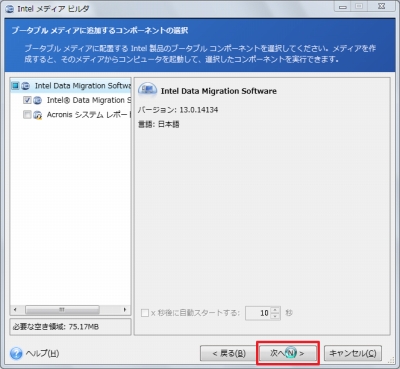
「コンポーネントの選択」が表示されますが、ここでは標準で選択されている「Intel Data Migration Software」のみを含んだブータブル メディアを作成しますので、そのまま[次へ]をクリックします。
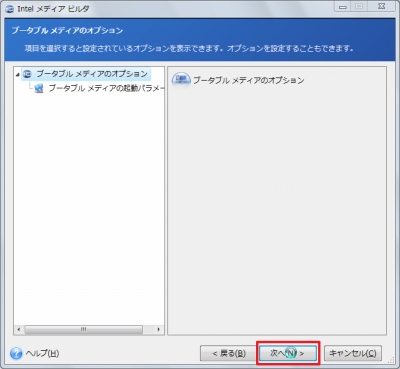
「ブータブル メディアのオプション」が表示されますが、この例では特にパラメータを設定しないため、[次へ]をクリックします。

「ブータブル メディアの種類の選択」が表示されます。
この例では、唯一表示されている「ISO イメージ」を選択し、[次へ]をクリックします。
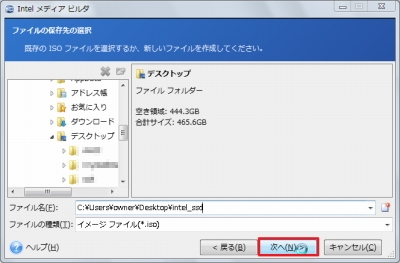
作成する ISO イメージファイルを保存する場所を選択し、ファイル名を入力します。
この例では「デスクトップ」を選択し、ファイル名を「intel_ssd.iso」としました。
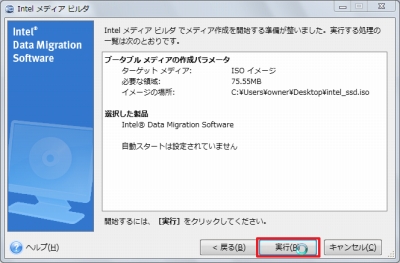
これまでの内容が表示されますので、問題なければ[実行]をクリックします。
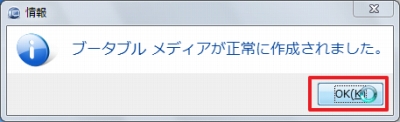
「ブータブル メディアが正常に作成されました」と表示されたら、[OK]をクリックします。
ISO イメージ ファイルの書き込み

ISO イメージファイル等を DVD や USB メモリーに書き込む方法については、次のサポート記事をご参照ください:
注意
- 本操作例は、Windows7 SP1 64bit のものです
スポンサードリンク