Ubuntu Server 22.04 LTS をインストールする方法です。
Ubuntu Server 22.04 LTS
Ubuntu Server は、Debian をベースとする Linux ディストリビューションのひとつである Ubuntu のサーバー用のものです。LTS は長期サポートを意味します。
ダウンロード
以下よりダウンロードします:
- Ubuntu 22.04.2 LTS (Jammy Jellyfish)
https://releases.ubuntu.com/22.04/ - Index of /releases/20.04.0
https://old-releases.ubuntu.com/releases/20.04.0/
※この例では「ubuntu-22.04.2-live-server-amd64.iso」をダウンロードしました
インストール メディアの作成
ISO イメージファイル等を DVD や USB メモリーに書き込む方法については、次のサポート記事をご参照ください:
インストール
インストール メディアから起動します。

「*Try or Install Ubuntu Server」が選択されていることを確認して[Enter]キーを押します。
しばらく黒い画面が表示されたり黒い画面に白文字の画面が表示されたりしますが、そのまま待ちます。
言語選択
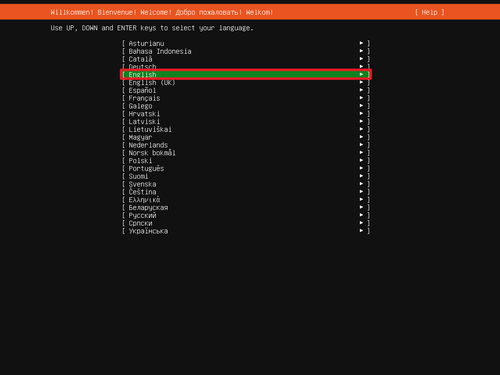
「Use UP, DOWN and ENTER keys to select your language.」と表示されたら、[English]が選択されていることを確認して[Enter]キーを押します。
※今後の操作で主に使用するキーは[↑][↓][←][→][Tab][Enter][Space]などです
キーボード設定
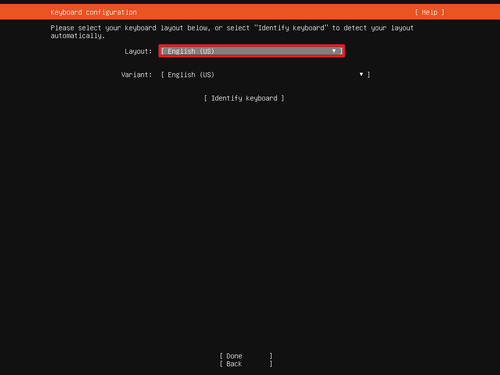
「Keyboard configuration」が表示されたら、「Layout」の「English (US)」に移動して[Enter]キーを押します。
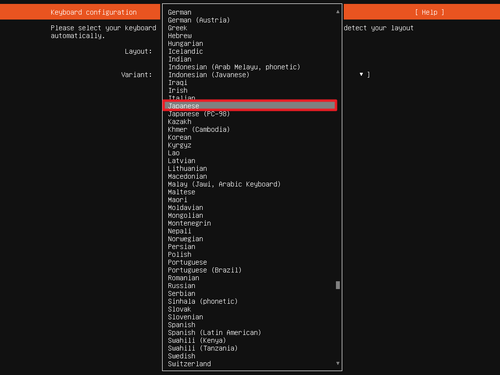
一覧から[Japanese]を選択して[Enter]キーを押します。
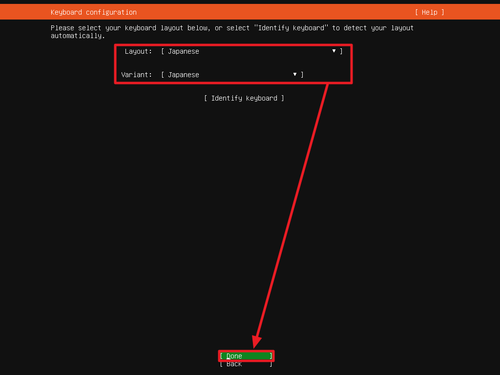
「Layout」と「Variant」が「Japanese」となっていることを確認し、[Done]に移動して[Enter]キーを押します。
インストール タイプの選択
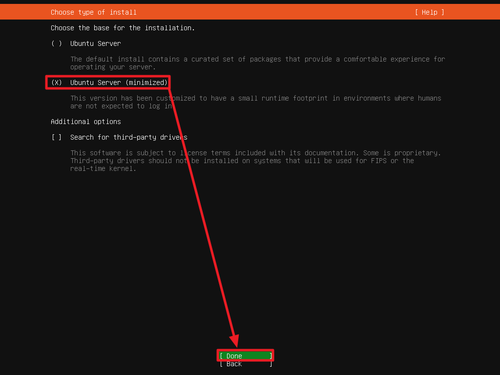
「Choose type of install」が表示されたら、「Ubuntu Server」または「Ubuntu Server (minimized)」を選択し、[Done]に移動して[Enter]キーを押します。
この例では、[Ubuntu Server (minimized)]を選択しました。
ネットワーク設定
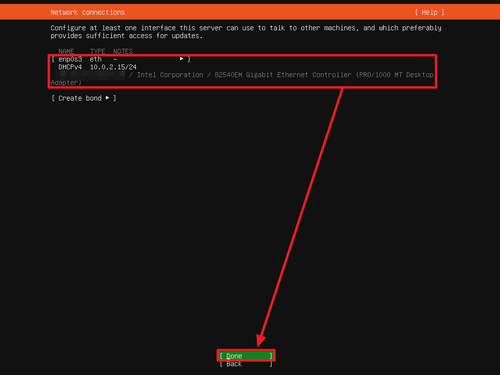
「Network connecstions」が表示されたら、使用する NIC 等を確認して[Done]に移動し[Enter]キーを押します。

「Configure proxy」と表示されたら (必要な場合は Proxy 設定を行い) 、[Done]に移動し[Enter]キーを押します。
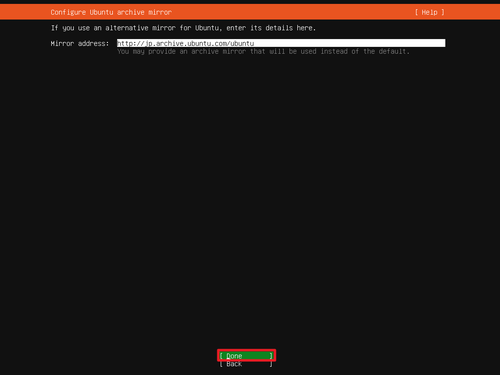
「Configure Ubuntu archive mirror」と表示されたら、[Done]に移動し[Enter]キーを押します。
ストレージ設定
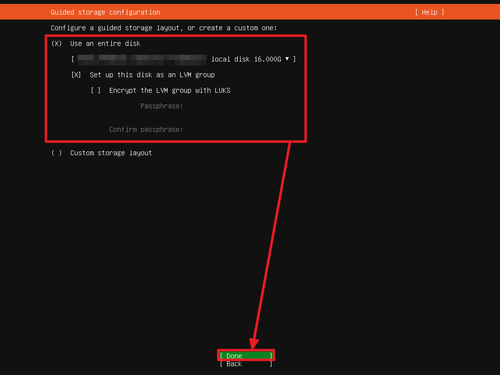
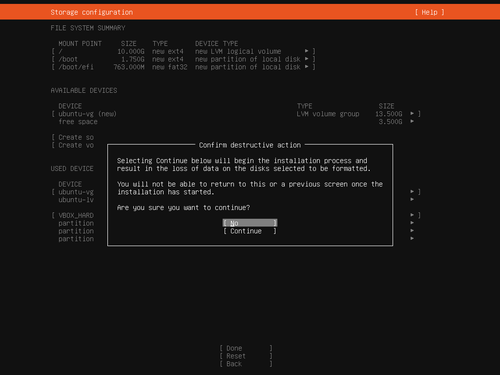
「Guided storage configuration」と表示されたら、インストール先のディスク、 LVM 、暗号化の内容を確認して[Done]に移動し[Enter]キーを押します。

表示される内容をよく確認し、続行する場合は[Done]に移動して[Enter]キーを押し、さらに「Continue」に移動して[Enter]キーを押します。
ユーザー設定
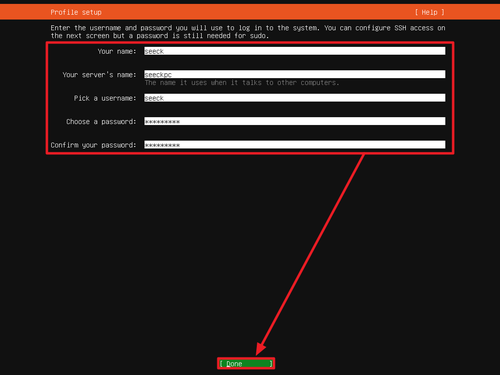
「Profile setup」が表示されたら以下の内容を入力し、[Done]に移動し[Enter]キーを押します:
- Your name
- Your server’s name
- Pick a username
- Choose a password
- Confirm your password
Ubuntu Pro
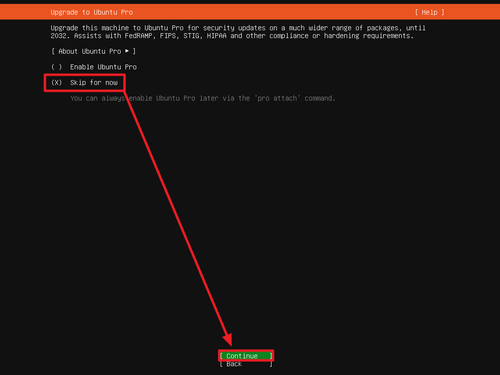
「Upgrade to Ubuntu Pro」と表示されたら[Skip for now]を選択し、[Continue]に移動し[Enter]キーを押します。
OpenSSH Server
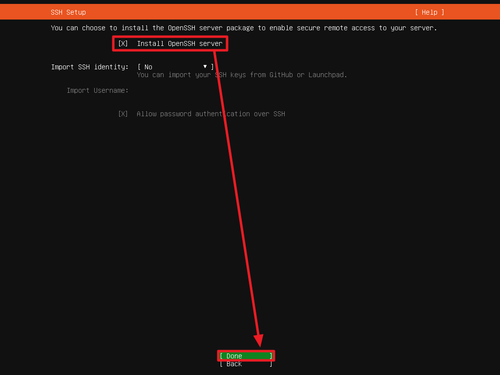
「SSH Setup」と表示されたら[Install OpenSSH server]にチェックを入れ、[Done]に移動し[Enter]キーを押します。
Server Snap
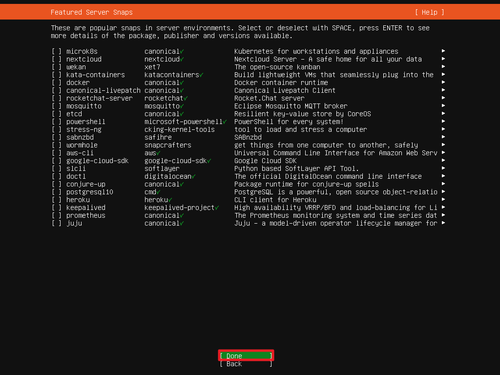
「Featured Server Snaps」と表示されたら (必要なものがあれば選択して) 、[Done]に移動し[Enter]キーを押します。
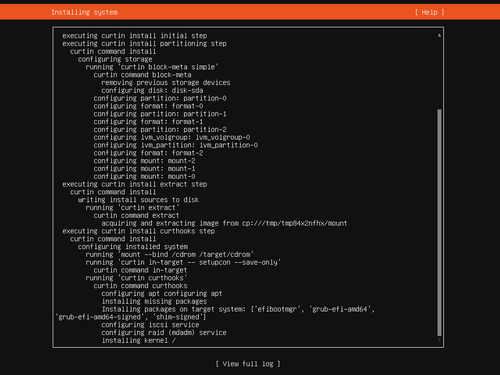
インストール
「Installing system」と表示されたら、インストールが完了するまで待ちます。
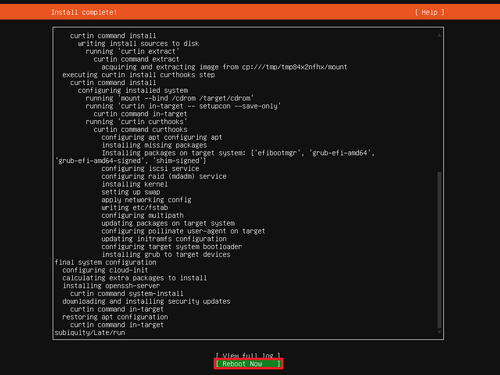
「Install complete!」と表示されたら、[Reboot Now]に移動し[Enter]キーを押します。
インストール完了後の操作
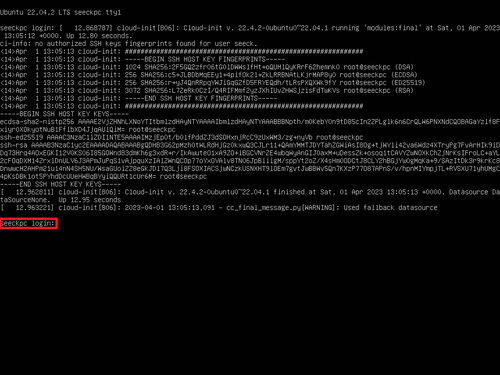
再起動が完了したらアップデートなどを行います。
SSH
サーバーのインストール作業などを除き、サーバー本体を直接操作することは少なく、基本的には SSH 接続を行うなどしてリモート操作を行います。
アップデート
アップデートを行うには、以下のコマンドを実行します:
$ sudo apt update
$ sudo apt upgrade -y
電源の切り方
電源を切るには、以下のコマンドを実行します:
$ sudo shutdown -h now関連
GUI 環境を構築する場合など Ubuntu Desktop 22.04 LTS のインストールする方法については、次のサポート記事をご参照ください:

様々な OS のインストールする方法については、次のサポート記事をご参照ください:
注意
- 本操作例は、新規環境に Ubuntu Server 22.04.2 LTS を最小インストールするものです
スポンサードリンク