VNC Viewer を使用してリモート アクセスする方法です。
VNC Viewer をインストールする方法
ダウンロード
以下よりダウンロードします:
- Download VNC Viewer | VNC® Connect
https://www.realvnc.com/en/connect/download/viewer/
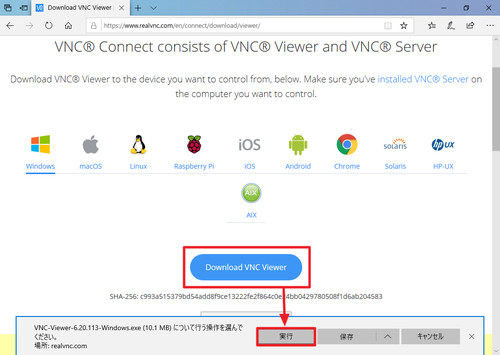
[Download VNC Viewer]をクリック、[実行]をクリックします。
※インストールせずに使用する場合は、ダウンロードするファイルが異なりますので、ページ下部をご参照ください
インストール

「Select the language to use during the installation:」と表示されたら[English]を選択し、[OK]をクリックします。
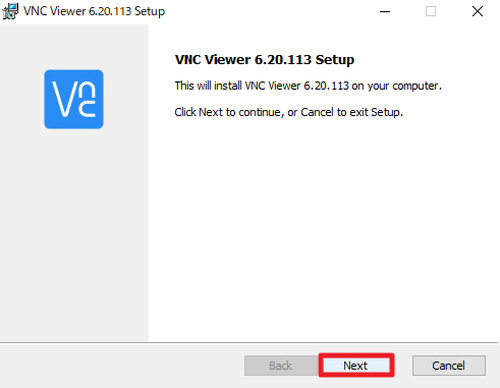
「VNC Viewer 6.x Setup」と表示されたら[Next]をクリックします。

「End-User License Agreement」が表示されたら、内容をよく確認し、同意できる場合は[I accept the terms in the License Agreement]にチェックを入れ、[Next]をクリックします。
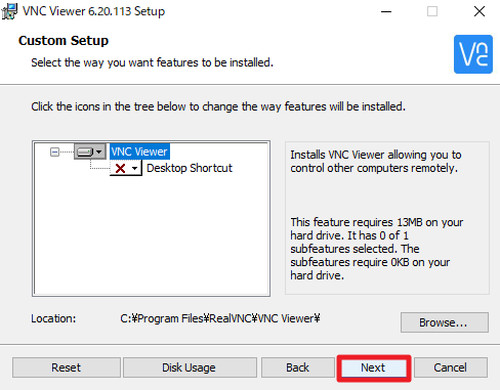
「Custom Setup」が表示されたら[Next]をクリックします。
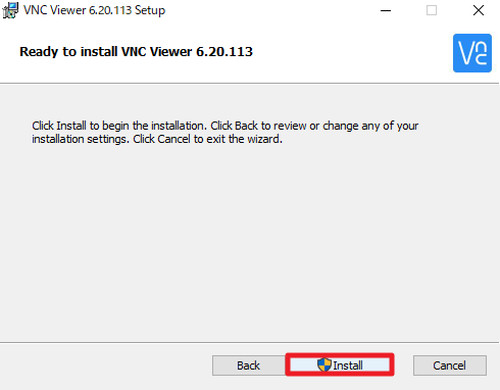
「Ready to install VNC Viewer 6.x」と表示されたら[Install]をクリックします。
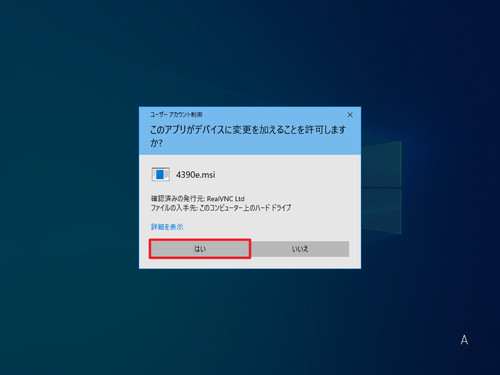
「ユーザー アカウント制御」が表示されたら[はい]をクリックします。

インストールが完了するまで待ちます。
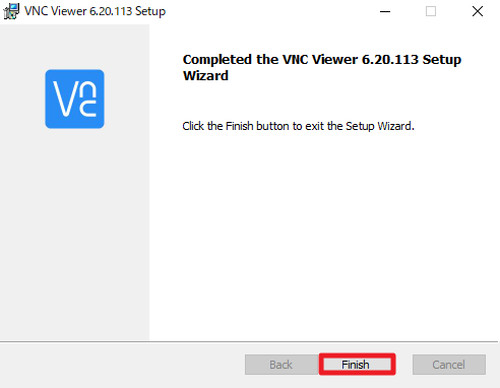
「Completed the VNC Viewer 6.x Setup Wizard」が表示されたら[Finish]をクリックします。
起動のしかた
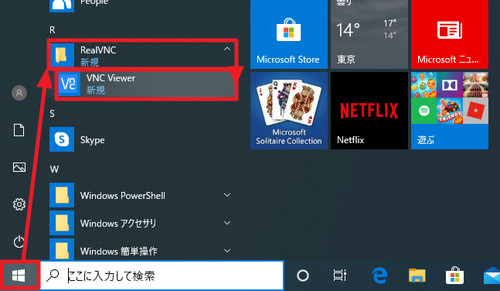
[スタート]をクリックし「RealVNC」内の[VNC Viewer]をクリックします。
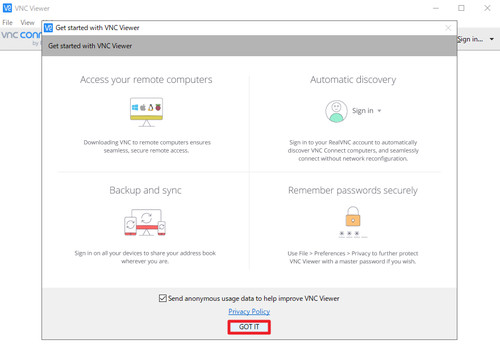
「Get started with VNC Viewer」が表示されたら[GOT IT]をクリックします。

起動したところ。
接続
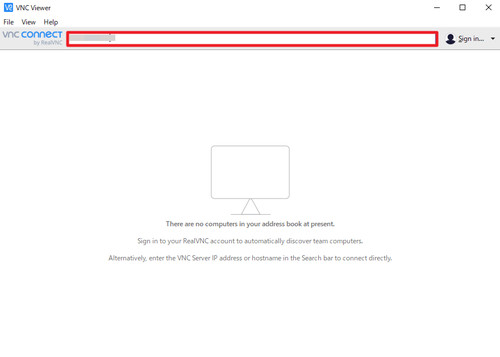
上図の赤枠内に接続先を入力して[ENTER]キーを押します。
例:192.168.1.8
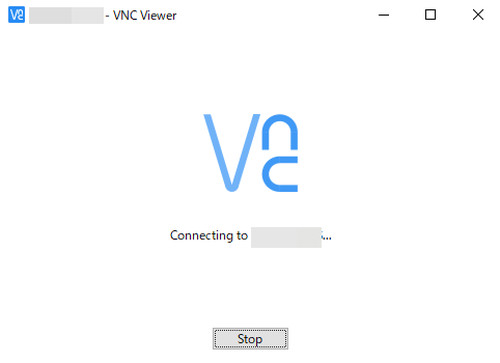
接続中の表示例。
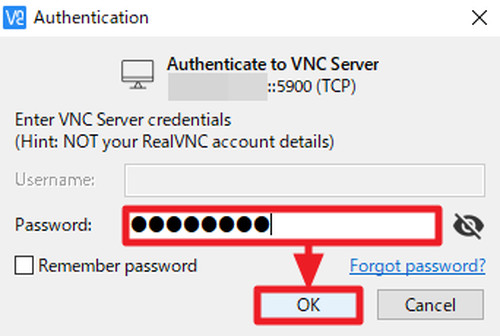
「Authentication」が表示されたらパスワードを入力し、[OK]をクリックします。
この際、「Remember password」にチェックを入れるとパスワードが保存されます。
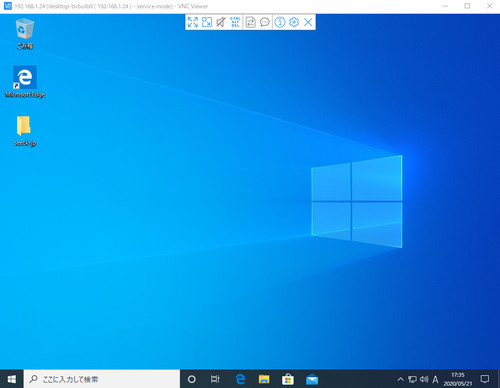
接続された例。
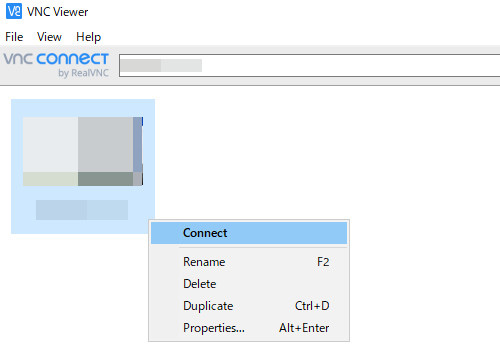
今回の接続によって一覧に接続先が追加された例。
接続先を右クリックするとメニューが表示されます:
- Connect … 接続する
- Rename … 名前を変更する
- Delete … 削除する
- Duplicate … 複製する
- Properties … プロパティ
VNC Viewer をインストールせずに使用する
ダウンロード
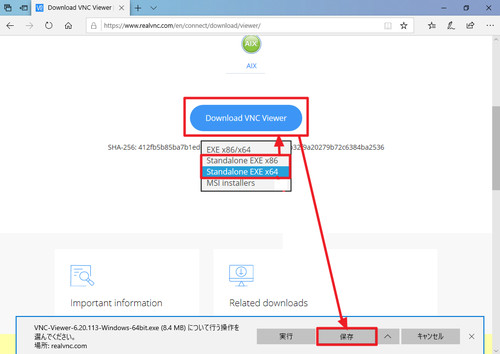
ファイル選択をクリックし、「Standalone EXE x64」または「Standalone EXE x86」を選択し、[Download VNC Viewer]をクリック、[保存]します。
お使いの環境が 64 ビット環境 (x64) か 32 ビット環境 (x86) か不明な場合は、次のサポート記事をご参照ください:
起動のしかた
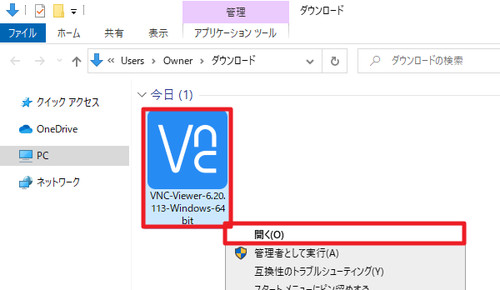
保存したファイル「 VNC-Viewer-6.xx.xxx-Windows-64bit.exe 」または「 VNC-Viewer-6.xx.xxx-Windows-32bit.exe 」をダブルクリックするか、[右クリック]して[開く]をクリックします。
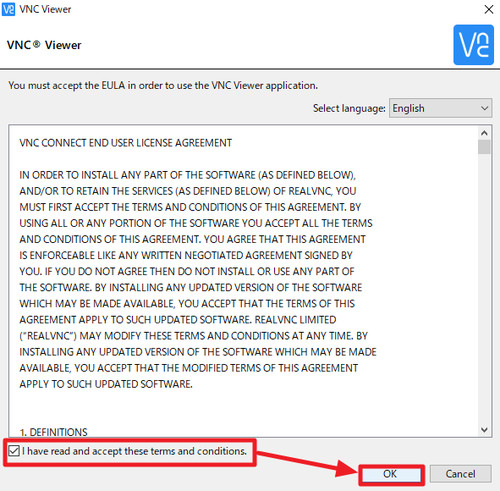
「You must accept the EULA in order to use the VNC Viewer application.」が表示されたら、内容をよく確認し、同意できる場合は[I have read and accept these terms and conditions.]にチェックを入れ、[Next]をクリックします。
起動したところ。
エラー例
Unencrypted connection
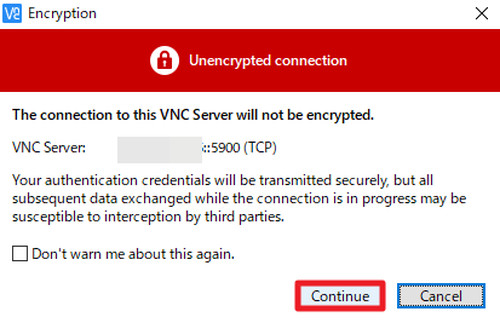
「Unencrypted connection」(非暗号化接続) と表示されたら、内容をよく確認し、接続を続行する場合は[Continue]をクリックします。なお、この際「Don’t warn me about this again.」にチェックを入れると再表示されなくなります。
Authentication rejected
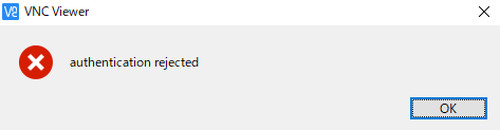
「authentication rejected」と表示された場合は、入力したパスワードなどの認証情報が正しくないため、接続が拒絶されました。再度接続操作を行い、正しい認証情報を入力します。
Timed out waiting for a response from the computer

「Timed out waiting for a response from the computer」と表示された場合は、接続先からの応答が得られずに待機時間が過ぎました。ネットワークの状態や、接続先の電源が入っているかなど通信が可能になっているか確認します。
The connection closed unexpactedly.
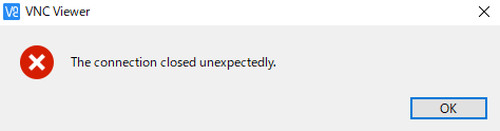
「The connection closed unexpactedly.」と表示された場合は、接続先から切断されました。
VNC Server をインストールする方法
ダウンロード
以下よりダウンロードします:
- Download VNC Server | VNC® Connect
https://www.realvnc.com/en/connect/download/vnc/
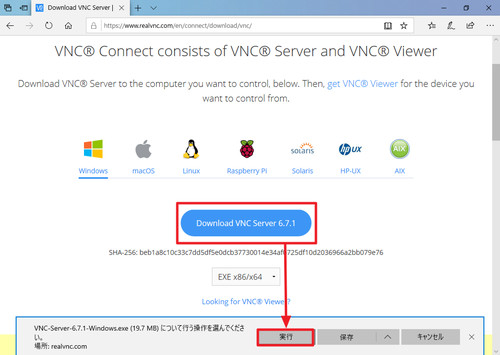
[Download VNC Server 6.x]をクリックし、[実行]をクリックします。
インストール
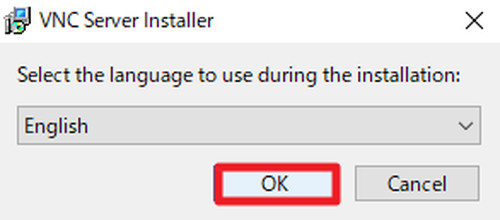
「Select the language to use during the installation:」と表示されたら[English]を選択し、[OK]をクリックします。
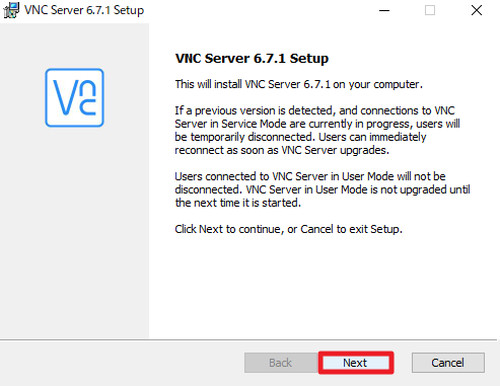
「VNC Server 6.x Setup」が表示されたら[Next]をクリックします。
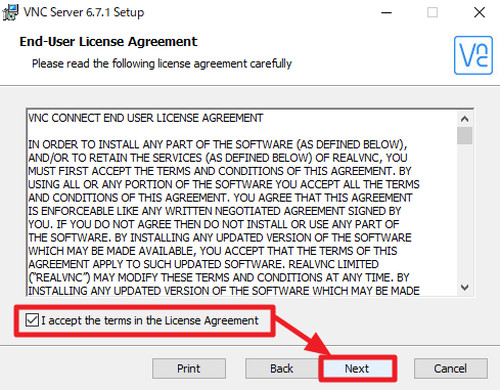
「End-User License Agreement」が表示されたら、内容をよく確認し、同意できる場合は「I accept the terms in the License Agreement」にチェックを入れ[Next]をクリックします。

「Custom Setup」が表示されたら[Next]をクリックします。
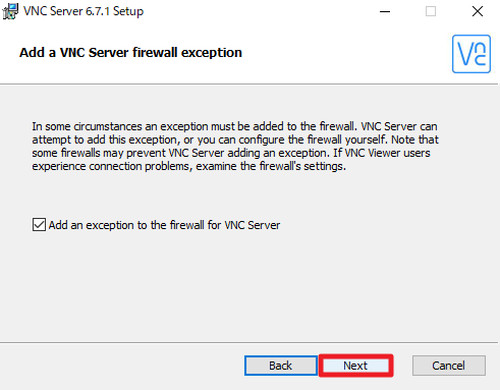
「Add a VNC Server firewall exception」が表示されたら[Next]をクリックします。
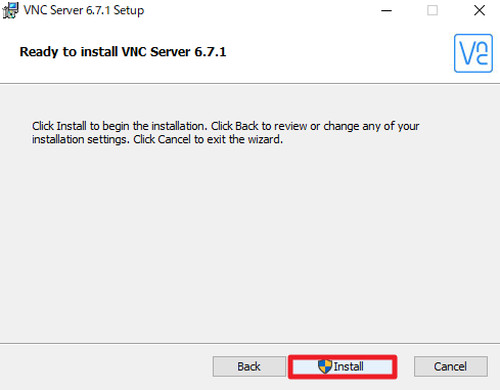
「Ready to install VNC Server 6.x」が表示されたら[Install]をクリックします。
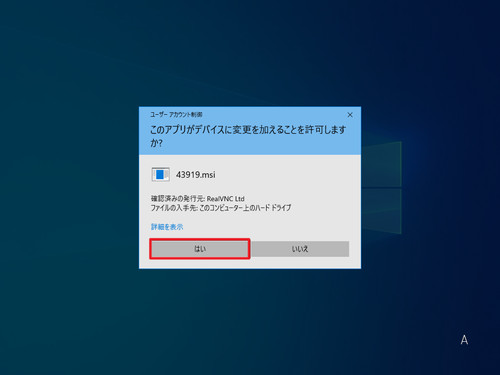
「ユーザー アカウント制御」が表示されたら「はい」をクリックします。
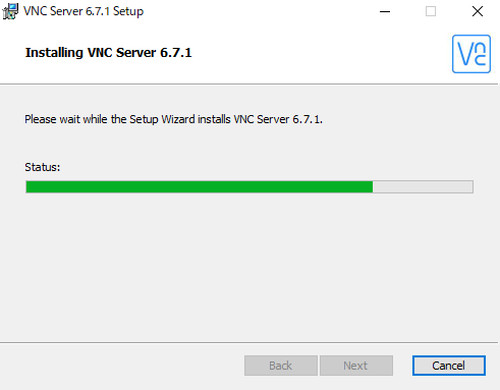
インストールが完了するまで待ちます。
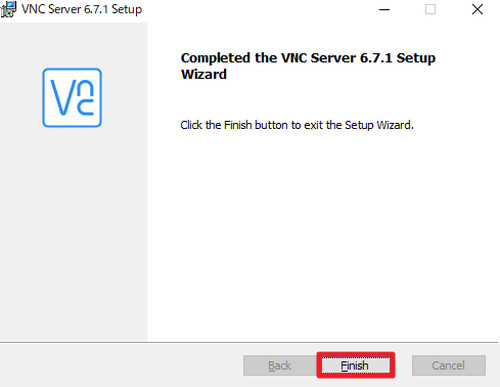
「Completed the VNC Server 6.x Setup Wizard」が表示されたら[Finish]をクリックします。
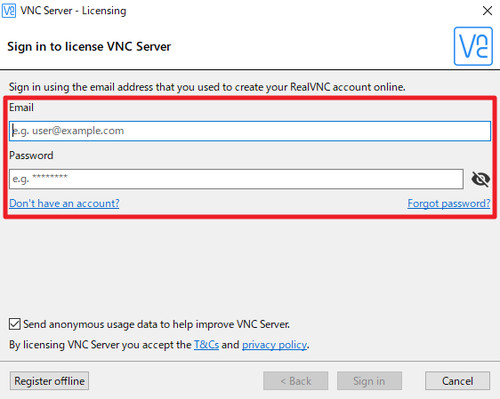
VNC のアカウントにサインインします。
- アカウントが無い場合は、「Don’t have an account?」をクリックします
- パスワードを忘れた場合は、「Forgot password?」をクリックします
以降の手順については、表示される画面によってインストールを完了します。
関連
様々な方法でリモート操作する方法については、次のサポート記事をご参照ください:
注意
- 本操作例は、Windows 10 のものです
- 接続例は、操作する側が本ページ記載の VNC Viewer 、操作される側が UltraVNC Server のものです
スポンサードリンク
コメント
[…] VNC Viewer をインストールする方法 (Ver.6.x) | SEECK.JP サポート […]